... a little course correction. For this blog, for my life.
When I decided on a name for this blog, my mind was working in a completely different direction. I was mostly being clever with all the little "journey" references sprinkled throughout. Who knew that the name and "theme" of this blog would coincide with my life?
For a variety of reasons, that I don't really care to go into in such a public forum, my husband and I will be making a major course correction in our lifestyle. It occurs to me, that documenting this journey in a blog makes a lot of sense. So, I'm going to be sharing the process as we make decisions and navigate this new course here, in prose and photo.
We've struggled, a lot, for a long time. We always find a way to land on our feet, eventually, and money has never been the driver of our lives. We've lived in apartments and rental property pretty much our entire married lives. Owning a home always sounded like something we "should" do, and whenever a landlord was being unreasonable about something, it even sounded like something we'd rather do. But most of the time, we've been perfectly happy renting.
We bought a house in Portland, OR in November, 2006. We were really excited. We got a GREAT deal on a nice little place, with a full basement, in a really nice neighborhood. Nothing too fancy or upscale at all. But extremely pleasant. We set about doing all the things we've always wanted to do but couldn't as renters. Painting walls, planting gardens, redecorating. Nesting.
April 2008, our daughter, son-in-love & then-just-barely-3-year-old granddaughter moved in with us. As we already had my mother-in-law living with us, that meant we had four generations under one roof. The kids have had full possession of half the basement, we share the master bath shower... two very small bathrooms for six people. There are lots of things to recommend the set up, and in lots of ways, it's been great.
However, I suppose it goes without saying that six people between the ages of 3 and 83 will have issues and stresses in such an arrangement. The Waltons we are not. Although, I've recently starting watching the Waltons reruns again... and maybe in some ways we are the Waltons! LOL! Smaller house, fewer kids, lots of the same drama and sweetness... not nearly as functional, I suspect.
But "Big Grandma," as our little bit calls her 5'2" great-paternal-grandmother, is not doing well. Healthwise, not so bad at 86, but she's been dealing with dementia for at least a decade. Until this year, it has mostly been amusing. She generally has known where she is and who we are and able to take care of her personal needs without too much assistance. She hasn't always remembered what year it is, or that "yes, mom, you have seen it snow here before... it snowed last winter," but she always knew where her room was and how to find her way back, from directly across the hall, when she was done.
Lately, this hasn't been the case. She doesn't always "play well with others," she wanders off without anyone realizing she's left, (how on earth does she do that???), she isn't able to care for herself as well anymore... still feeds herself, but there are other issues... mostly, she's just not "here" much of the time. For a variety of reasons, we realize, this just isn't working. For anyone.
On top of that, the kids are looking at some changes in their lives too. They will be moving on at the end of the year, first of next year. But even if all that weren't the case, we simply cannot continue on financially here. (Thank you Bush-Obama Administrations.) Serious changes have to be made.
Hopefully between February 2012 & July 2012 we will be living full time in... a motor home. We are researching all the practical issues involved in making this change, and preparing ourselves emotionally for all the transitions, and losses, this will generate.
Mom will be in a full time facility. We feel guilty... as much for the relief that will bring as the feeling that we are abandoning her. (We aren't, but it feels that way.) Losing daily contact with "my sunshine." I'll especially miss our "bedtime chats." That will be hardest for me, personally. Possibly not being able to hang out with my daughter like we've been able to do since they moved in. Pop in downstairs to watch Dr. Who or chat or ask a question... or answer a knitting question.
Getting rid of almost all our worldly possessions. That's a biggie. On the plus side, the kids won't have to do it when we pass. Right? We are going to secure a small storage unit... to make the transition a little more slowly. We'll keep, at least for a while, the most critical stuff we'd need if we had to move into an apartment again, but it is really more for psychological soothing, I suspect.
This entire transition, on pretty much every level, is going to be hard. But I think it is going to be a good change, really for all of us. In ways we cannot appreciate now. God has unexpected ways of blessing us. Sometimes, it doesn't feel like a blessing at first. But experience tells me, He is always "on my side," no matter what I think at the moment.
Who knew, when I chose the name "Roving StarPoints" last year that this Star would be roving from one point to another, and writing about it, a year later? What kind of Providence is in that? I HATE to move. But it is the "transfer of stuff" from one place to another and all the details and issues that usually come up without warning that makes me crazy(ier).
Based on my preliminary research, this will be different. Once the initial purging of superfluous "stuff" is done and the remaining essentials and treasures are safely ensconced on board The Motor Home or tucked securely into the storage unit, "moving" won't be the same thing as it has been in the past. Rolling your home and goods down the road to a new location is not quite the same as moving all your stuff from one stationary place to another stationary place.
There is a lot more to all of this, and in the days, weeks, months, ahead, I'll make the case for our decision and share the process with you as we make this transition. It'll be hard. But it'll be exciting, and I expect, rewarding in lots of ways too. Maybe others will not have considered this as a viable option for their lives, as I did not, but discover... "gee, maybe this might work for me too."
Join us as we find...
Joy in the Journey,
Elianastar
P.S.: There will be a new category or two in the Book~Shop as we find resources related to our lifestyle change... books & goods that will make life easier as we make these changes.
P.P.S.: I am re-knitting my UDP, to check for errors, etc. and expect to be finished in the next day or so. Then, it will be on to test knitters, tech edit... and finally, submission. I finished the first one and used it for Sock Summit. It performed precisely as designed & I can not wait to share it with the world!
Showing posts with label Elianastar. Show all posts
Showing posts with label Elianastar. Show all posts
Sunday, August 7, 2011


Friday, July 15, 2011
UDP = Unidentified Design Project
... so. I've been working on several design projects since spring of 2010. None of them are completed. But I'm finally closing in on the finish line for one of them! (Another is close to completion.)
I won't divulge what the project is yet, other than to say, I'm excited about finally completing it... so I can use it! This first design is the brain-child of my frustration, which is just as valid a "mother of invention" as necessity... frustration's very close sibling.
Designing is a challenging, frustrating, rewarding, unpredictable, repetitive, exciting, time-consuming endeavor. There is an inordinate amount of frogging, tinking, and re-knitting. (At least the way I do it, which is likely more OCD than necessary.) Patience is not only a virtue if you want to design something from scratch, it is essential to maintain your sanity! The ability to recognize when you're almost at the limit of that patience is essential to protect the design in process! If you push past that limit you risk a fit of irrational rage that may well result in the dismantling of the entire thing in a screaming fit.
Designing is an exercise in creative problem-solving. "I want to do this, but I've got to have an even number of stitches to do that. I've got an uneven number and those stitches are not divisible by the number of repeats I need. How am I going to add those stitches I need... or remove the excess stitches I have... where am I going to make that change, what kind of increases or decreases will look best, and how will those choices impact the balance of the design?" Each of those decisions has a direct impact on a following element of the design unless they are the last decisions in the piece.
"Form follows function" may not be universally true in architecture but it sure has a strong influence on knitting & crochet design in my experience! The inverse is also true: if you alter the function, you'll most likely have to alter the form. I've found this particularly true in the very small project the design of which is taking "forever" to complete. Every element of this project has an impact on every other element, esthetic as well as intended function. It is really more an "engineered" project than a "designed" project! Don't let the small size fool you.
The "form" of the design, each aspect of the form, has a specific "function," either independently or as it relates to and impacts every other "form" in the design.
All that to bait you with this... the finished design is an object intended to make knitting and crochet on the go, or in a stationary position, less frustrating and more "compact."
... stay tuned for details. :-)
Joy in the Journey,
Elianastar
I won't divulge what the project is yet, other than to say, I'm excited about finally completing it... so I can use it! This first design is the brain-child of my frustration, which is just as valid a "mother of invention" as necessity... frustration's very close sibling.
Designing is a challenging, frustrating, rewarding, unpredictable, repetitive, exciting, time-consuming endeavor. There is an inordinate amount of frogging, tinking, and re-knitting. (At least the way I do it, which is likely more OCD than necessary.) Patience is not only a virtue if you want to design something from scratch, it is essential to maintain your sanity! The ability to recognize when you're almost at the limit of that patience is essential to protect the design in process! If you push past that limit you risk a fit of irrational rage that may well result in the dismantling of the entire thing in a screaming fit.
Designing is an exercise in creative problem-solving. "I want to do this, but I've got to have an even number of stitches to do that. I've got an uneven number and those stitches are not divisible by the number of repeats I need. How am I going to add those stitches I need... or remove the excess stitches I have... where am I going to make that change, what kind of increases or decreases will look best, and how will those choices impact the balance of the design?" Each of those decisions has a direct impact on a following element of the design unless they are the last decisions in the piece.
"Form follows function" may not be universally true in architecture but it sure has a strong influence on knitting & crochet design in my experience! The inverse is also true: if you alter the function, you'll most likely have to alter the form. I've found this particularly true in the very small project the design of which is taking "forever" to complete. Every element of this project has an impact on every other element, esthetic as well as intended function. It is really more an "engineered" project than a "designed" project! Don't let the small size fool you.
The "form" of the design, each aspect of the form, has a specific "function," either independently or as it relates to and impacts every other "form" in the design.
All that to bait you with this... the finished design is an object intended to make knitting and crochet on the go, or in a stationary position, less frustrating and more "compact."
... stay tuned for details. :-)
Joy in the Journey,
Elianastar
Saturday, January 8, 2011
Book Review: Color Knitting
"The Essential Guide to Color Knitting Techniques"
by Margaret Radcliffe
Available in hardcover-only U.S.; paperback UK-only. Edit: author has informed me the paperback version is UK-available only; in US only available in hardcover.
The first 23 pages alone are worth the cost of this book! Even those who already have a good working knowledge of color theory will find some great ideas unique to working with yarn and fiber.
Do you tend to pick up a skein of yarn from sale bins or order an unseen ball of yarn online... just to figure out if you might like it or to see the color in person? What are you gonna do with it now? Consider how this information might influence your work if you spin or dye yarn yourself!
"Everyone perceives color a bit differently, and our responses to certain colors or groups of colors are a matter of personal preference as well as psychology & perception." This is probably no more true than when we are talking about what we wear & how we choose to artistically use yarn in knit (and crochet) projects. A refreshing bit of news for those with "color phobia" is the author's statement that there are "no right or wrong combinations, there are just color groupings, or colorways, that have different effects," and then she proceeds to demonstrates this reality in specific and creative ways. You can take vast amounts of the information in this book to modify and "dress up" patterns you've already got, or apply this information to "from scratch" designs you are cooking up!
She begins by describing the relevant aspects of color that are most useful to understand as fiber artists. Beginning with basic color theory, accompanied with particularly helpful full color graphics, she helps us to understand that especially in fiber, "context" is everything. A color with a specific appearance by itself can and will appear quite different depending on what colors are next to it and in what quantity. A little bit of a color you despise by itself can be successfully combined with other colors in such a way as to make it the star of the project... if you understand how colors affect one another.
That hank of neon green or hot pink lace weight yarn that you bought online and now have no idea what on earth you'd ever do with it can be stranded with other lace weight yarns, with specific color impact that will tone it down to a "temperature" that you can love. Or double-stranded with worsted weight yarn or triple-stranded with a single sport weight yarn to create a completely different fabric than the original yarns alone would produce.
And, you don't have to swatch and swatch and swatch to determine which colors in which variations or sequences will give you the results you are looking for. But when you are ready to swatch a little, what kinds of things do you need to know? If you are using more than one strand of different yarns &/or different thicknesses, how do you know what size needle to use? What about one color bleeding into another color?
All of this is covered in just the first 23 pages of the book! See what I mean?
From there, you are taken on a journey of different ways to knit colors together to achieve different results. You are not only given ideas about how to combine colors, but you are also taught actual knitting techniques involved in getting the best results combining different colors and different yarns together.
Stripes are perhaps the easiest way to combine different colors. Flat knitting and in-the-round techniques are addressed. How to carry yarn along, how to add in new yarn colors, what to do with yarn ends, what are the best way to work stripes in stockinette or garter stitch, how to make diagonal stripes, how do you make ribbed stripes look "clean," how do you make stripes reversible for a scarf? Ever make stripes in circular knitting? You know that "jog" where you start a new round in a different color that makes you nuts? There are a couple of ways to disguise and modify that uneven change! And you can add texture to your circular stripes too. What about combining pattern stitches to spice up your stripes? All of this is covered in pictures and tutorial explanations every step of the way, culminating in variations of a scarf pattern.
Incorporating color into pattern stitches can turn a "blah" project into a masterpiece. Color swatches, complete with written stitch patterns, charts, and a series of variations on this same stitch pattern are included for over twenty stitch patterns, interspersed with knitting techniques to improve your successful execution.
Love multicolor yarn... not so pleased with pooling and other issues when you start knitting with it? This book will help you apply knitting and stitch techniques to get a result you'll love depending on the specific kind of multicolor yarn you are using.
From there, you are taken on a tour of stranded knitting techniques for that Scandinavian look. How to manage multiple strands of color, how to prevent holes when changing colors, dealing with tangles and unevenness and shaping... all the basic, and not-so-basic, things you'll appreciate. Do you know what a "steek" is and how to do them... or why you'd ever want to know? You will when you've finished this chapter.
Intarsia or "picture knitting" is covered as thoroughly as every other topic, with color photos and helpful tutorials all along the way.
Now most people would think that would pretty well cover all one might possibly want to know about knitting in color, wouldn't you? Would you believe there is MORE? Helix, shadow, mosaic, twined, double knitting, and modular knitting... including entrelac... all covered as well!
But wait! There's more! Finishing techniques including decorative bind offs and embellishments carries you to the final chapter. How do you modify existing patterns to incorporate these techniques or design a project from scratch using this information? What might you need to consider regarding the kind of fabric that will be best for your project and which technique to apply to get that best fabric? Answers are here.
Last but far from least, the book closes with an Appendix that covers basic knitting skills, garment sizing guidelines, abbreviations and symbols, a bibliography, and an outstanding index to locate specific information later. There are a few patterns in this book, but if you are looking for color-work designs and patterns book, you'll probably be happier with a book that has a different focus.
After you've learned the basics of combining color in yarn and see all the different ways you can knit a multicolor project, you'll not hesitate to pick up one or two balls of yarn at the fiber show or from the sale bin at the local yarn shop (LYS) or order that spectacularly priced clearance yarn online. Because you'll know you can mix and match and finesse that fiber goodness into a finished project that will make that "lonely only" into a work of art! This book holds the potential to save you a lot of money, spark your creative juices, and expand your skill set. Really... how can you lose?
by Margaret Radcliffe
Available in hardcover-only U.S.; paperback UK-only. Edit: author has informed me the paperback version is UK-available only; in US only available in hardcover.
The first 23 pages alone are worth the cost of this book! Even those who already have a good working knowledge of color theory will find some great ideas unique to working with yarn and fiber.
Do you tend to pick up a skein of yarn from sale bins or order an unseen ball of yarn online... just to figure out if you might like it or to see the color in person? What are you gonna do with it now? Consider how this information might influence your work if you spin or dye yarn yourself!
"Everyone perceives color a bit differently, and our responses to certain colors or groups of colors are a matter of personal preference as well as psychology & perception." This is probably no more true than when we are talking about what we wear & how we choose to artistically use yarn in knit (and crochet) projects. A refreshing bit of news for those with "color phobia" is the author's statement that there are "no right or wrong combinations, there are just color groupings, or colorways, that have different effects," and then she proceeds to demonstrates this reality in specific and creative ways. You can take vast amounts of the information in this book to modify and "dress up" patterns you've already got, or apply this information to "from scratch" designs you are cooking up!
She begins by describing the relevant aspects of color that are most useful to understand as fiber artists. Beginning with basic color theory, accompanied with particularly helpful full color graphics, she helps us to understand that especially in fiber, "context" is everything. A color with a specific appearance by itself can and will appear quite different depending on what colors are next to it and in what quantity. A little bit of a color you despise by itself can be successfully combined with other colors in such a way as to make it the star of the project... if you understand how colors affect one another.
That hank of neon green or hot pink lace weight yarn that you bought online and now have no idea what on earth you'd ever do with it can be stranded with other lace weight yarns, with specific color impact that will tone it down to a "temperature" that you can love. Or double-stranded with worsted weight yarn or triple-stranded with a single sport weight yarn to create a completely different fabric than the original yarns alone would produce.
And, you don't have to swatch and swatch and swatch to determine which colors in which variations or sequences will give you the results you are looking for. But when you are ready to swatch a little, what kinds of things do you need to know? If you are using more than one strand of different yarns &/or different thicknesses, how do you know what size needle to use? What about one color bleeding into another color?
All of this is covered in just the first 23 pages of the book! See what I mean?
From there, you are taken on a journey of different ways to knit colors together to achieve different results. You are not only given ideas about how to combine colors, but you are also taught actual knitting techniques involved in getting the best results combining different colors and different yarns together.
Stripes are perhaps the easiest way to combine different colors. Flat knitting and in-the-round techniques are addressed. How to carry yarn along, how to add in new yarn colors, what to do with yarn ends, what are the best way to work stripes in stockinette or garter stitch, how to make diagonal stripes, how do you make ribbed stripes look "clean," how do you make stripes reversible for a scarf? Ever make stripes in circular knitting? You know that "jog" where you start a new round in a different color that makes you nuts? There are a couple of ways to disguise and modify that uneven change! And you can add texture to your circular stripes too. What about combining pattern stitches to spice up your stripes? All of this is covered in pictures and tutorial explanations every step of the way, culminating in variations of a scarf pattern.
Incorporating color into pattern stitches can turn a "blah" project into a masterpiece. Color swatches, complete with written stitch patterns, charts, and a series of variations on this same stitch pattern are included for over twenty stitch patterns, interspersed with knitting techniques to improve your successful execution.
Love multicolor yarn... not so pleased with pooling and other issues when you start knitting with it? This book will help you apply knitting and stitch techniques to get a result you'll love depending on the specific kind of multicolor yarn you are using.
From there, you are taken on a tour of stranded knitting techniques for that Scandinavian look. How to manage multiple strands of color, how to prevent holes when changing colors, dealing with tangles and unevenness and shaping... all the basic, and not-so-basic, things you'll appreciate. Do you know what a "steek" is and how to do them... or why you'd ever want to know? You will when you've finished this chapter.
Intarsia or "picture knitting" is covered as thoroughly as every other topic, with color photos and helpful tutorials all along the way.
Now most people would think that would pretty well cover all one might possibly want to know about knitting in color, wouldn't you? Would you believe there is MORE? Helix, shadow, mosaic, twined, double knitting, and modular knitting... including entrelac... all covered as well!
But wait! There's more! Finishing techniques including decorative bind offs and embellishments carries you to the final chapter. How do you modify existing patterns to incorporate these techniques or design a project from scratch using this information? What might you need to consider regarding the kind of fabric that will be best for your project and which technique to apply to get that best fabric? Answers are here.
Last but far from least, the book closes with an Appendix that covers basic knitting skills, garment sizing guidelines, abbreviations and symbols, a bibliography, and an outstanding index to locate specific information later. There are a few patterns in this book, but if you are looking for color-work designs and patterns book, you'll probably be happier with a book that has a different focus.
After you've learned the basics of combining color in yarn and see all the different ways you can knit a multicolor project, you'll not hesitate to pick up one or two balls of yarn at the fiber show or from the sale bin at the local yarn shop (LYS) or order that spectacularly priced clearance yarn online. Because you'll know you can mix and match and finesse that fiber goodness into a finished project that will make that "lonely only" into a work of art! This book holds the potential to save you a lot of money, spark your creative juices, and expand your skill set. Really... how can you lose?
Sunday, October 31, 2010
Current status on hats for U.S.S. Decatur
I just received an acknowledgement note that my package has been received and for those who are interested in this project, the newest blog post... with photos... from Adventures in Paradise is linked here.
My apologies for not posting more lately. I've had many not-good days of late. Several days when I was doing better, I worked on some front yard gardening... planting bulbs for spring and moving some roses from the back and side yard to the front yard. I can't wait until spring now! I feel like that old Mervyn's store commercial... I stand at the living room window and say, "spring! spring! spring!"
My BearMan has provided some hardscaping in the front yard which will be filled with flowers in the spring & summer...

 There will be peonies, roses, a few iris, and tons of spring bulbs in the oval planter. I'm not certain what else will go there, but another climbing rose will be trained up the arbor on the driveway side when I find the "perfect" rose. The peonies
 and two of the roses were already on the property when we moved here. Surrounding the basement egress under the living room, more spring bulbs including daffodils
 , tulips
 and crocus
 , as well as cyclamen
 , bleeding heart, astilbe
 , and columbine
 have been planted. Except for the front corner where the existing azaleas remain... for now... very little sun falls in this area, so these are almost entirely all shade plants. The interior of the basement egress walls will be painted to help reflect more light into the basement, later this spring. Also later in the spring, after they have flowered and been pruned, the azaleas along the driveway, and those in the planter in front, will be moved to the property line, behind and to the left of the rose planter.

 A second egress access is being constructed around the basement window on the other side of the front since I took these photos. When that is done, the other side of the front of the house will be prepared for more shade plants this spring & summer.
The hydrangea will have a new home as it was planted directly in front of the basement window, which had to be severely excavated to eventually install an egress window. By the front door is an "ancient" rhododendren. After it flowers this spring, it will be at least a third shorter. I've been "taming" it for a couple of years now. I still need to dig up the hostas and divide them. The area that is largely brown between the rhodie and the hydrangea now has been covered with a wild variety of bleeding heart so lush you cannot see anything but green and the little purple-red flowers through spring and summer. I'll keep some of it, but the entire area will likely be replanted with new shade plants once the planting area has been installed.
 In addition to the gardening, on "better days," I've also been working on "behind" the scenes projects. But, I will try to do better posting... I'm working on getting all my photos backed up to a different drive, but I then have to export photos to a different folder to share them here...
It is hard to see in the front yard, but in the back yard, our neighbor has a maple tree that is almost in full fall color. The temps and weather have finally seemed to recognize that it is time to be cool and rain... I love this time of year!


My apologies for not posting more lately. I've had many not-good days of late. Several days when I was doing better, I worked on some front yard gardening... planting bulbs for spring and moving some roses from the back and side yard to the front yard. I can't wait until spring now! I feel like that old Mervyn's store commercial... I stand at the living room window and say, "spring! spring! spring!"
My BearMan has provided some hardscaping in the front yard which will be filled with flowers in the spring & summer...

 There will be peonies, roses, a few iris, and tons of spring bulbs in the oval planter. I'm not certain what else will go there, but another climbing rose will be trained up the arbor on the driveway side when I find the "perfect" rose. The peonies and two of the roses were already on the property when we moved here. Surrounding the basement egress under the living room, more spring bulbs including daffodils, tulips and crocus, as well as cyclamen, bleeding heart, astilbe, and columbine have been planted. Except for the front corner where the existing azaleas remain... for now... very little sun falls in this area, so these are almost entirely all shade plants. The interior of the basement egress walls will be painted to help reflect more light into the basement, later this spring. Also later in the spring, after they have flowered and been pruned, the azaleas along the driveway, and those in the planter in front, will be moved to the property line, behind and to the left of the rose planter.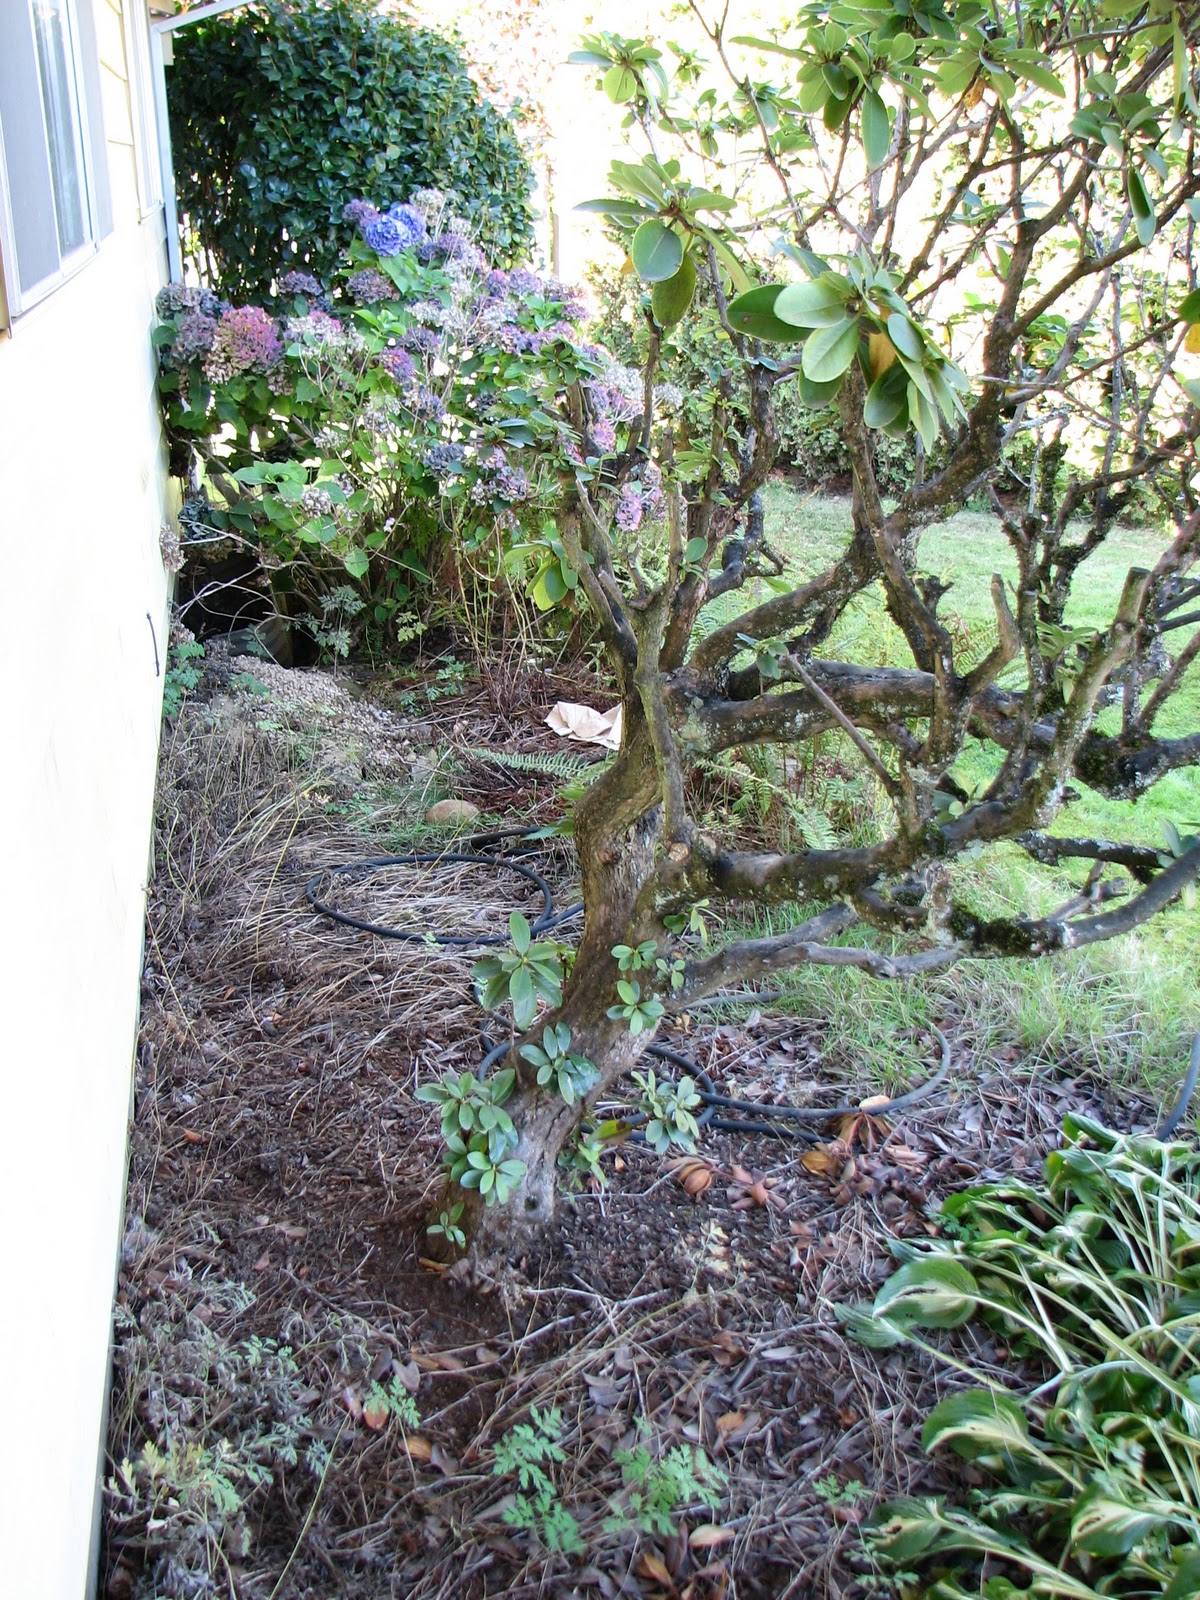
 A second egress access is being constructed around the basement window on the other side of the front since I took these photos. When that is done, the other side of the front of the house will be prepared for more shade plants this spring & summer.
The hydrangea will have a new home as it was planted directly in front of the basement window, which had to be severely excavated to eventually install an egress window. By the front door is an "ancient" rhododendren. After it flowers this spring, it will be at least a third shorter. I've been "taming" it for a couple of years now. I still need to dig up the hostas and divide them. The area that is largely brown between the rhodie and the hydrangea
now has been covered with a wild variety of bleeding heart so lush you cannot see anything but green and the little purple-red flowers through spring and summer. I'll keep some of it, but the entire area will likely be replanted with new shade plants once the planting area has been installed. In addition to the gardening, on "better days," I've also been working on "behind" the scenes projects. But, I will try to do better posting... I'm working on getting all my photos backed up to a different drive, but I then have to export photos to a different folder to share them here...
It is hard to see in the front yard, but in the back yard, our neighbor has a maple tree that is almost in full fall color. The temps and weather have finally seemed to recognize that it is time to be cool and rain... I love this time of year!


Joy in the journey,
Elianastar

Tuesday, October 12, 2010
Sailor Hats 1 & 2

I finished my hats for the U.S.S. Decatur sailors! They were both very fast knits... one day each! I was able to use yarn already in my stash for both projects: Knit Picks Swish Bulky in Tidepool (discontinued color) for the hat on the left, and Knit Picks Swish Worsted in Truffle for the hat on the right.

The first hat I completed is the "Waffle Hat" from the KnitHats website. I just wasn't confident after swatching that the hat would be of adequate size, so I cast-on 88 sts rather than the 76 the pattern calls for. I tend to knit tightly, but even after obtaining gauge with the suggested needle size... doing the math for the finished size of the pattern, based on the st/in measurement, just seemed on the small side. I have a 22.5 inch noggin, though, and was also concerned that "big head" guys might not have enough hats to choose from. Better too large than too small. You can fold the bottom up more to make the hat shorter, and the stitch pattern is basically a 2x2 rib, so it has plenty of stretch to fit pretty much everyone.
 Still, I hate a hat so tight repairing "hat head" requires electro shock. When a hat feels like a tourniquet I simply will not wear it. I don't want it so loose it won't stay on or permits wind to blow up inside, but I don't want to require the millinery version of a shoehorn to get it on my head either. And I want a watchcap style hat to cover my ears easily, thank you, so I added an inch to the height.
My finished Waffle Hat measures 10" tall by 16" diameter and is very stretchy. It would easily fit a 24" diameter head. One full skein, and a portion of a second skein... less than half... on 5mm (#8) needles got the job done nicely.

My second hat was inspired by "Ed's Hat" from the Lion Brand Yarn website. However, that pattern was designed to be used with Wool-Ease Thick & Quick yarn... a super bulky. The yarn I had to use was Knit Picks Swish Bulky, not super bulky, so this was gonna require math to make it work. I despise math. I'd rather be shot than do math. Since I would have to swatch anyway to make my yarn work with this pattern, I decided to design my own. I've been toying with some ideas for "tutorial knits," using a project to teach skills, so I decided to make this a "sampler hat."
It is worked in the round, using the Magic Loop technique, my preferred in-the-round knitting technique. It could just as easily be made using DPNs (double point needles or "pins," as they are charmingly referenced in Euro parlance), or two circulars, if preferred. When I get the pattern worked up, there will be a tutorial version and a simple pattern version. If one already knows how to knit in the round, or how to do Magic Loop, they can simply follow the traditional pattern.
 However, if one is a "knitting newbie," ready to progress from scarves and baby blankets to a hat and other "circle" projects, everything one needs to successfully complete this hat using the Magic Loop technique will be in the tutorial version. (Less the enthusiasm & motivation the knitter must bring to the project, of course.) If you've been looking for a small, fast, project to learn the Magic Loop technique, this tutorial will hold your hand through that process. After you've used the tutorial, I'd love any feedback you might have that you feel would have provided additional support to your success, or simply to make it even easier for you.
Because time is of the essence due to the mailing deadline necessary to get donations to their destination in a timely manner, it is necessary to delay the final edition of the pattern. I'd like to consider whether to add some photos and if I do, that will necessitate a second knit of the hat. Which is fine because I'm planning on making another for myself anyway.
 The tutorial version will be written for "newbie" knitters, assuming nothing. Using larger needles and yarn will cause the project to go quickly, and no more than ten rounds of any stitch pattern comprises any part of the design. All based on variations of knit and purl stitches, it is only the sequencing of the knit and purl stitches that modifies the various textures of the stitch patterns in this design. Most are based on a "rib" type stitch pattern to provide maximum stretch to the design, which will make the FO (finished object) a great gift pattern. Two types of decreases are included, k2tog (knit two together) and p2tog (purl two together), and the design encourages the use of the Cable Cast-on while offering justifications for learning this skill.
I've decided to call the pattern, "Sampler Skills Watchcap," because it is a sampler of several skills and stitch patterns. Once the first hat is completed, additional hats can easily be customized using one of the stitch patterns through the body of the hat or any other multiple-of-four-stitch patterns that equally divides eight. Maintain the 2x2 ribbing at the top and the bottom, along with the stockinette and garter stitch section, but knit the section in-between in one or a combination of the stitch patterns of the original Sampler version. Or continue in stockinette or garter stitch or use an "any number of stitches" stitch pattern. Lots of variations for a weekend knit gift hat!
With the brim rolled up, this hat measures 18" in diameter and 8" deep. It has tons of stretch though, so it will comfortably fit a head at least 24" in diameter.
Might I also say... Knit Picks Swish Bulky is a dream to work with! SO soft, it works up quickly, "frogs" and "tinks" nicely, (there is no designing without a good supply of each), is superwash... which means it can be gently washed by machine... is one of the softest 100% wools I've felt, (love Merino), and with the textured stitch patterns, will be very snuggly and warm on cold windy days and nights. This hat takes a single skein to complete. I'm not sure why, or how, the bulky version is softer than the worsted version, but it sure feels like it is.
Okay. I'm off to request the mailing address to send my hats in. :-)
(Lynne @ lengelbert.at.gmail.dot.com if you need to get the address too.)
(Lynne @ lengelbert.at.gmail.dot.com if you need to get the address too.)
Joy in the journey,
Elianastar

Tuesday, September 21, 2010
September 2010 UFOs, WIPs, & DIP...
Alphabet soup. It has been a difficult year for me, personally, and I find that I am feeling overwhelmed by all the things I've started, all the things I've wanted to start but couldn't see my way clear, and a number of designs I'm either working on or have in mind yet.
Which has created my alphabet soup: UnFinished Objects (UFO), Works In Progress (WIP), and Designs In Progress (DIP). My only good news in this would be that all three of these are the same things! That makes things just a bit less overwhelming. The other good news is, most of the projects are very, very, close to being completed. At which point, I'll begin the process of getting the patterns written up so they can be tested and checked by a tech editor, etc.
I have a great project that is at the top of my list to finish... but I can't even give you a hint what it will be. Sorry, but it's just such a great idea I want to keep it "under wraps" for now. Well... at least, to me it is a great idea. Even if no one else likes it, I can't wait to finish up the design and pattern so I can submit it for consideration to Knit Picks Independent Designer Program. If it should not be accepted, I'll make it available for sale via this blog and Ravelry.
I've got a pair of short-finger gloves in which the core of the pattern is done. I've only got to knit up the fingers in the first glove and make sure the "mirror directions" for the other glove is right and knit that one up. Then I'll be able to finish writing up the pattern and begin the process of prepping necessary before unleashing a pattern on the world.
I've finished the foundational design on a pair of child legwarmers and my granddaughter is getting a little impatient for me to knit the second leg so she can wear them to school soon. I've resigned myself to the reality that the prototype pair will have to be reknit again for submission cuz there is no way a five year old will wait for the rest of the process to be complete for grandma's end plan.
I've got a cowl that I've made a number of for my own use and as gifts for the past several years, but I'd like to write it up into a pattern because I think lots of other people will enjoy the process of making it as well as using it. I've not made a decision on the best Knit Picks yarn to use for the design. I've used Lion Brand Homespun in previous incarnations, but I'm anxious to "upgrade" the design from an acrylic-based yarn and translate the design from a bulky yarn to something lighter. I've made the design in the past in both crochet and knit, and will eventually make the knit and crochet design available using Lion Brand Homespun because it is such a great, fast, project for gifts and I rarely wear any of them without a compliment before I'm back home.
I've also already purchased the yarn for a felted bag pattern to design and write up. It is gorgeous in my head! I'm still toying with the best way to design the "picture in my head" into an actual project others will like to make too.
And I've not even mentioned the other projects I have in mind for myself that will probably become patterns too. One thing I'm learning about designing projects for others to make... it is a lot more time consuming than just making something for myself! I tend to knit and crochet the way I cook: a recipe is just the place to begin. I may or may not use all the ingredients in the recipe, and I may or may not use any in the amounts prescribed. There is an excellent chance I'll bring my own sense of flavor to the finished product. Which means, unless I take careful notes as I go, I won't be able to recreate exactly the same thing myself and neither will anyone else. Which isn't a problem if it is not my goal to create a new recipe, just something to eat. Designing a pattern for someone else to recreate, requires a lot more attention to detail and thought about how to word the directions so a stranger will comprehend accurately what they need to do to get the same results. Whew! That's not nearly as easy as you think when you aren't really thinking about it.
I wanted to start Wendy Knits Shetland Pi Shawl KAL, but another swarm of migraines and feeling guilty about the other unfinished projects have pushed that back. I've got the yarn and had already decided to make a Pi shawl of some sort, so that is still on the agenda. Perhaps, if there are a sufficient number of followers when I get to a place to start it, we can do it together. I hope to start it before the end of the year, but I probably need to be realistic that holiday knitting is just around the corner and I may not be able to start it as soon as I'd like.
I also want to start knitting socks before the end of the year. I've purchased yarn to make a few pair for my BearMan and this is primarily why I want to learn to make socks. I've got a bunch of sock yarn that I've been collecting, a little here, a little there, for almost three years. I also have designs on attending the Sock Summit in Portland, OR in 2011... so I best get to knitting! I want to have the basics down well enough that I can "pick the brains" of anyone willing to teach me their secrets and show me their tricks.
Basically, this has been a confessional. I'm hoping this will motivate me further to stay on task, wrap up all these projects, and get them in the queue towards completion and publication.
Please feel free to mitigate any of my consternation about my failure to be further along on my projects by sharing your own frustrations about yours. Heeheehee. "Misery loves company," right?
Joy in the journey,
Thursday, September 16, 2010
Series ~ Why Swatch?... Dimension, Part One
The reason most often given to "swatch" is so that one can assure themselves they will "obtain gauge" with the yarn and size needles or hook prescribed for a given project. If you are new to knitting or crochet projects... and for far too many who are not... this exercise seems like a complete waste of time, not unlike washing dishes and making beds. In other words, if it gets done, great... if it doesn't, oh well. But, the truth is, swatching... done properly... serves many useful purposes, and as bizarre as it sounds, saving time, is actually one of the best.
Swatch. Odd word isn't it? In the arena of "tmi" (too much information), the word can be traced back to 1512, meaning to "countercheck a tally," and later from 1612 it came to mean "a tally attached to cloth sent to be dyed." But, by 1647, it was simplified to mean "a sample piece of cloth."
So, a swatch is intended to be a characteristic prototype of the fabric you will create with this size tool and this weight and texture of yarn.
For the crocheter or knitter, this specimen is most frequently referred to as a "gauge swatch." This is where the time saving comes in. You create a sample fabric of sufficient size to accurately measure how many stitches per inch you will get, which directly translates into the final measurements of your project. It is the "accurate" part that is most important. If your swatch is too small, relative to your needle or hook size and the thickness of your yarn - particularly - you will not obtain an accurate measurement of stitches per inch... gauge.
You create a sample swatch so that you can accurately gauge what your finished dimensions will be.
Depending upon what your project is, the gauge part of making a swatch may be more or less critical. In terms of size, if you aren't making one thing that has to fit another thing in a specific way, one might be inclined to think a swatch isn't all that important. If one is making a washcloth or scarf or baby blanket, for example, there probably won't be a major problem... in terms of size... if your gauge swatch is off a couple of stitch counts one direction or the other. It isn't going to matter all that much if the finished project is larger or smaller so long as it is not dramatically so.
Not "getting gauge" for these projects will matter in one of three ways more than any other:
- you will either not have a sufficient amount of yarn to make the project the same size as your pattern dictates, or,
- you will have yarn left over in an amount you didn't expect; (there is no such thing as "too much yarn," by the way), and,
- your fabric will be more "stiff" or less "stiff," (have a different "hand" or "drape"), than it was designed to have; "hand" = the tactile feel of, texture; "drape" = manner of hang, flow, loose folds
Monday, September 6, 2010
Swatch Series - Introduction
Feelings about swatching tends to be a rather polar topic... if you know what it is at all. The goal for this series is to define and explain what a "swatch" is and all the ways it can make your yarn crafting better... and more fun. Yes. I said, FUN.
Most think of swatching as a chore to be avoided at all costs. It "wastes" time and yarn," the naysayers proclaim. Even though few things are less true, some make adamant declarations that it is better left undone and you'll be just fine if you give this advice a pass. It is my intention to encourage you to consider an opposing opinion.
Some have learned just how valuable swatches are... even when they aren't actually working on a project. (huh?) It is my goal to place you firmly into this category by the end of this series. Set your misgivings, (or disdain), about swatching aside and give me an open-minded hearing? At least consider the varied uses for swatching and try some of them, sooner rather than later?
After the Swatching Series is complete, we'll explore other ways to play with yarn and needles and test out new stitch patterns. Whether you prefer to knit or crochet, swatching is an important part of the creative process. Done properly and completely, it can save time and material... not to mention frustration and grief.
This is just a teaser of things to come. I'm not entirely certain just yet how many segments this series will have, as my goal is to keep each segment to a reasonable length, but it appears right now that there will be at least four in the core series. To assist in making this series as useful as possible, I'd love feedback regarding the following questions:
What are your feelings about knitting or crocheting swatches? Do you usually make gauge swatches before beginning a project? What issues have you had because you did or did not swatch before starting a project? Are there other uses for swatches that you've discovered? What case would you make against swatching before beginning a new project? Do you have any other thoughts or misgivings about swatching? Can you make a good case for swatching? Do you have any "I should have swatched first" stories you'd like to share?
Joy in the journey!
Elianastar
Additional comments viewable @ "To swatch or not to swatch..." at the Knit Picks Community, or @ "To swatch or not to swatch..." at the Knit Picks Lovers Group on Ravelry if you are a member of Ravelry. (Both are free Communities)
Thursday, August 12, 2010
ADHD & lace chart reading
Really simple directions. Both written and charted. Because I'm new to chart reading, I've decided to rely on the chart and only fall back on the written directions if I get lost or confused... or too frustrated. :-)
I can tell when I'm really struggling with ADHD issues when I'm knitting. I think I'm paying really close attention. But, I get to the end of the row and there are too many stitches left. Or not enough to complete the stitch pattern. I tink back and sometimes find what I overlooked or the stitch that got dropped or... and sometimes not.
I've restarted this swatch a half dozen times now. But better to get the flow of the stitch pattern in a swatch and work out the kinks before starting the shawl. Right?
I've been teaching myself to recognize most of the basic symbols in a chart on sight, but this will be the first time I've actually knit from a chart.
Shetland Pi Shawl Swatch Chart
The first three runs at the swatch, I somehow ended up with extra stitches at the end of the first chart row. The second three runs I wasn't doing what the pattern told me do. Remember that saying about "assuming"? Yeah.
The last time through, the "Work these 6 sts 3x" finally sunk in. So, I restarted and have successfully knit the first three rows, as instructed, and successfully knit all the stitches, one time through, in the chart.
So, now I'm on the seventh attempt and think I've figured it out. I'm nothing if not tenacious! I'll finish up the swatch tonight, and hopefully take pre-blocked photos tomorrow, and some photos of the cakes of yarn I've wound so far to make the shawl, and post them in the next few days.
So. How are you doing?
I can tell when I'm really struggling with ADHD issues when I'm knitting. I think I'm paying really close attention. But, I get to the end of the row and there are too many stitches left. Or not enough to complete the stitch pattern. I tink back and sometimes find what I overlooked or the stitch that got dropped or... and sometimes not.
I've restarted this swatch a half dozen times now. But better to get the flow of the stitch pattern in a swatch and work out the kinks before starting the shawl. Right?
I've been teaching myself to recognize most of the basic symbols in a chart on sight, but this will be the first time I've actually knit from a chart.
 |
| Shetland Pi Shawl swatch by WendyKnits |
- Lesson number one: read completely through the pattern before starting. Check.
- Lesson number two: carefully count each stitch in each row as you knit the foundation rows and don't just assume that because you started out with the right number of stitches (three times) that there will still be that same number of stitches when you are ready to begin the stitch pattern. Check.
- Lesson number three: when there are dotted lines separating out a subset of symbols, with words under them, telling you to repeat that set of six stitches 3x... don't ignore them simply because it didn't compute the first five times you kinda sorta noticed they were there but didn't really read them or think about what, exactly, they are telling you to do. Check, check.
The first three runs at the swatch, I somehow ended up with extra stitches at the end of the first chart row. The second three runs I wasn't doing what the pattern told me do. Remember that saying about "assuming"? Yeah.
The last time through, the "Work these 6 sts 3x" finally sunk in. So, I restarted and have successfully knit the first three rows, as instructed, and successfully knit all the stitches, one time through, in the chart.
- Lesson number four: working the next row after yarn overs (yo) in the previous row, make sure you don't accidentally knit that yarn over together with the knit stitch. Too easy to miss!
- Lesson number five: everything is "easy" once you've paid sufficient attention to actually do what you thought you did.
- Lesson number six: if at first you don't succeed, you probably were not paying sufficient attention.
So, now I'm on the seventh attempt and think I've figured it out. I'm nothing if not tenacious! I'll finish up the swatch tonight, and hopefully take pre-blocked photos tomorrow, and some photos of the cakes of yarn I've wound so far to make the shawl, and post them in the next few days.
So. How are you doing?
Joy in the journey!
Elianastar
Elianastar
Tuesday, August 10, 2010
To christen our new blog...
... we’ve elected to join a new KAL! We’d love it if you joined us too!
I recently started following the “WendyKnits” blog. August 8th she posted a blog post entitled, “I Have an Idea,” and it struck a cord with me. About to finish knitting the Elizabeth Zimmermann 100th Anniversary Shawl, and wanting to knit another, she’s written up the design for a “fairly easy pi shawl that uses some traditional shetland lace motifs.” She has on hand 1760 yards of fingering weight yarn, and most of that yarn is slated to become this new shawl.
The thing that caught my interest, I think, is that she plans to start a KAL (knit-a-long) wherein she’ll release the pattern in pieces... a little at a time... and offer detailed comments as she knits the project herself.
I confess, I have no idea what a “traditional shetland lace motif” is. So, I did an internet search. From what I can glean, Shetland Lace is the opposite of Eyelet Lace. Eyelet Lace is mostly fabric with holes in it. Shetland Lace appears to be holes with enough fabric to hold the holes together. The most famous example of Shetland Lace is the Wedding Ring Shawl... so fine it can be drawn through a wedding ring upon completion. We’re talking “open” lace, here. Beyond that, I’m at a loss other than to say it is frequently mentioned in the company of Orenburg Lace... which I found to be almost as useful. LOL! They both seem to be beautiful examples of classic lace knitting with lots of patterning and I’m intrigued to see a Pi version.
“Pi,” you ask? What does “pi” mean? Pi is a mathematical term equivalent to 3.14159265, which represents the ratio of any circle’s circumference, (the measurement of the outside of the circle), to its diameter, (the measurement of the circle from one side, across the middle, to the other side; half the circle’s width). If I told you that it is “the same value as the ratio of a circle’s area to the square of its radius,” it would be redundant for you if you already knew what “pi” was... and mean absolutely nothing to you if you didn’t. Suffice it to say... it has something to do with figuring out how to make a circle if you are knitting or crocheting one. The only other thing I know for certain is that the concept of a Pi Shawl was the brain-child of Elizabeth Zimmermann, and is frequently suggested as a “first shawl” project, and can be found in “Elizabeth Zimmermann's Knitting Workshop” book... among other places.
To summarize, this shawl will be an easy, really pretty, open lace, circle shawl. The rest, I’ll have to figure out later, but I’m not gonna let my ignorance undermine my enthusiasm!
If you’ve not knit a lace shawl before, this could be the ideal time to start. Getting a small segment of the pattern at a time will make the entire project less intimidating and overwhelming. Remember, all knitting is simply one stitch after the last... you can do this!
Additionally, you don’t have to start with lace weight yarn... the pattern is designed for fingering weight, but you could use larger needles and sport, or even DK, weight, if you prefer. Come on... live adventurously! Besides all of that, joining in a KAL means you have a place to ask all your questions and have lots of encouragement from others making the same project, including knitters who have done this sort of thing before. I’m not one of those.
This will be my first “pattern” lace shawl project. I’m designing a lace shawl... slowly... now, but I’ve never actually made a complete shawl before and never followed a lace shawl pattern. Because I’ve been collecting lace yarn for four years... a little here, a little there... I’ve got tons of lace weight yarn to use in my stash so I’ve picked out some of that for this project. This Pi Shawl is not a small shawl, so it is very appealing to me to be able to make a good-sized dent in my lace yarn stash! And I figure when I’ve finished this project, I’ll be ready to start either the original Pi Shawl, or maybe one of the EZ 100th Anniversary Shawl versions... and use up more of that lace yarn!
Another plus about this project is that it has five different stitch patterns... each could be a different color yarn if you don’t have enough of one color. I don’t have enough of one color that I want to devote to this project, but I have three colors that should look great together and between them, I should have more than enough. As long as it is all the same weight yarn, complementary colors, and can be washed in a similar way, you’re good to go!
In Wendy’s August 9th post, she talks about yarn and needles for the project. If you don’t already have fingering weight yarn in your stash to begin the project, check out Knit Picks’ fingering weight yarn options for some cost-effective options. One hank of Gloss Fingering supplies 220 yds of 70% Merino & 30% Silk at a cost of $3.99 per hank. Another great option for this project would be KP’s Stroll Tonal: 462 yards per hank @ $9.99 each. However, if you are game for a lace weight yarn, you might consider Shadow Lace at a mere $2.99 per hank of 100% Merino, 440 yards each! This is an incredibly soft, supple, snuggly yarn, in some beautiful heather shades... you’ll love your shawl if you choose this yarn and the price couldn’t be better! You could also explore the options at Little Knits or Elann.
If you need any needles, I highly recommend any Knit Picks needles. I use Nickel Options, for pretty much everything, but you might prefer Harmony Options with lace or fingering yarn for a shawl. I plan to use a 32” cable for this project and may or may not start the project with nickel DPNs. If not, I’ll use the Magic Loop technique to begin the shawl on my circular needles.
If you already have the yarn and needles you need, Wendy has posted the swatch pattern. Everything you need to know to prep to begin the project is already at hand. If you don’t have yarn in your stash to begin, you’ll either need to visit your LYS (local yarn shop) and purchase a sufficient supply of heather, softly varigated, or solid color yarn... or place an order online. If you order online, it’ll be a week to ten days before you can start, but from the posts I’ve seen quite a few who have responded will be doing the same thing and there is no rush on the project, nor is there any penalty if you fall “behind” in any way. Some will knit more slowly than others and some will not be able to begin at the same time the pattern sections are released so don’t let that deter you in any way.
Whatever other choices you make about your yarn for this project remember it is best to use an animal fiber yarn for lace work as blocking opens up the stitches to show them off to their fullest. You can block other fibers, but not as easily.
I will be winding yarn from hanks onto my nostepinne for the next few days, as I’ve got time to spend winding yarn, so I won’t be starting immediately myself. When I’ve got some of my yarn wound, I’ll take a photo of the cakes and post them here for you.
In the meantime, welcome to our blog! There is still lots to do before we are all set up so please excuse the disarray... we are still adding stuff and organizing things. I’ll be importing some earlier posts I’ve done, in time, but for now you can read them at the Knit Picks Community where they currently reside... or wait patiently until I get copies of them over here.
We appreciate your patience and look forward to visiting with you again soon! If you should choose to participate in the Shetland Pi Shawl KAL, please keep us posted on your progress? If we can be any help or encouragement we’d be pleased to support you in anyway we are able! Even if it means directing you to another source of information. :-)
Joy in the journey!
Elianastar
P.S.: If you are interested in the EZ 100th Anniversary Shawl, you can download the pattern free from Ravelry. You have to be a member to access the download, but that’s free too! There are already three versions of this shawl available on Ravelry... all free downloads.
I recently started following the “WendyKnits” blog. August 8th she posted a blog post entitled, “I Have an Idea,” and it struck a cord with me. About to finish knitting the Elizabeth Zimmermann 100th Anniversary Shawl, and wanting to knit another, she’s written up the design for a “fairly easy pi shawl that uses some traditional shetland lace motifs.” She has on hand 1760 yards of fingering weight yarn, and most of that yarn is slated to become this new shawl.
The thing that caught my interest, I think, is that she plans to start a KAL (knit-a-long) wherein she’ll release the pattern in pieces... a little at a time... and offer detailed comments as she knits the project herself.
I confess, I have no idea what a “traditional shetland lace motif” is. So, I did an internet search. From what I can glean, Shetland Lace is the opposite of Eyelet Lace. Eyelet Lace is mostly fabric with holes in it. Shetland Lace appears to be holes with enough fabric to hold the holes together. The most famous example of Shetland Lace is the Wedding Ring Shawl... so fine it can be drawn through a wedding ring upon completion. We’re talking “open” lace, here. Beyond that, I’m at a loss other than to say it is frequently mentioned in the company of Orenburg Lace... which I found to be almost as useful. LOL! They both seem to be beautiful examples of classic lace knitting with lots of patterning and I’m intrigued to see a Pi version.
“Pi,” you ask? What does “pi” mean? Pi is a mathematical term equivalent to 3.14159265, which represents the ratio of any circle’s circumference, (the measurement of the outside of the circle), to its diameter, (the measurement of the circle from one side, across the middle, to the other side; half the circle’s width). If I told you that it is “the same value as the ratio of a circle’s area to the square of its radius,” it would be redundant for you if you already knew what “pi” was... and mean absolutely nothing to you if you didn’t. Suffice it to say... it has something to do with figuring out how to make a circle if you are knitting or crocheting one. The only other thing I know for certain is that the concept of a Pi Shawl was the brain-child of Elizabeth Zimmermann, and is frequently suggested as a “first shawl” project, and can be found in “Elizabeth Zimmermann's Knitting Workshop” book... among other places.
To summarize, this shawl will be an easy, really pretty, open lace, circle shawl. The rest, I’ll have to figure out later, but I’m not gonna let my ignorance undermine my enthusiasm!
If you’ve not knit a lace shawl before, this could be the ideal time to start. Getting a small segment of the pattern at a time will make the entire project less intimidating and overwhelming. Remember, all knitting is simply one stitch after the last... you can do this!
Additionally, you don’t have to start with lace weight yarn... the pattern is designed for fingering weight, but you could use larger needles and sport, or even DK, weight, if you prefer. Come on... live adventurously! Besides all of that, joining in a KAL means you have a place to ask all your questions and have lots of encouragement from others making the same project, including knitters who have done this sort of thing before. I’m not one of those.
This will be my first “pattern” lace shawl project. I’m designing a lace shawl... slowly... now, but I’ve never actually made a complete shawl before and never followed a lace shawl pattern. Because I’ve been collecting lace yarn for four years... a little here, a little there... I’ve got tons of lace weight yarn to use in my stash so I’ve picked out some of that for this project. This Pi Shawl is not a small shawl, so it is very appealing to me to be able to make a good-sized dent in my lace yarn stash! And I figure when I’ve finished this project, I’ll be ready to start either the original Pi Shawl, or maybe one of the EZ 100th Anniversary Shawl versions... and use up more of that lace yarn!
Another plus about this project is that it has five different stitch patterns... each could be a different color yarn if you don’t have enough of one color. I don’t have enough of one color that I want to devote to this project, but I have three colors that should look great together and between them, I should have more than enough. As long as it is all the same weight yarn, complementary colors, and can be washed in a similar way, you’re good to go!
In Wendy’s August 9th post, she talks about yarn and needles for the project. If you don’t already have fingering weight yarn in your stash to begin the project, check out Knit Picks’ fingering weight yarn options for some cost-effective options. One hank of Gloss Fingering supplies 220 yds of 70% Merino & 30% Silk at a cost of $3.99 per hank. Another great option for this project would be KP’s Stroll Tonal: 462 yards per hank @ $9.99 each. However, if you are game for a lace weight yarn, you might consider Shadow Lace at a mere $2.99 per hank of 100% Merino, 440 yards each! This is an incredibly soft, supple, snuggly yarn, in some beautiful heather shades... you’ll love your shawl if you choose this yarn and the price couldn’t be better! You could also explore the options at Little Knits or Elann.
If you need any needles, I highly recommend any Knit Picks needles. I use Nickel Options, for pretty much everything, but you might prefer Harmony Options with lace or fingering yarn for a shawl. I plan to use a 32” cable for this project and may or may not start the project with nickel DPNs. If not, I’ll use the Magic Loop technique to begin the shawl on my circular needles.
If you already have the yarn and needles you need, Wendy has posted the swatch pattern. Everything you need to know to prep to begin the project is already at hand. If you don’t have yarn in your stash to begin, you’ll either need to visit your LYS (local yarn shop) and purchase a sufficient supply of heather, softly varigated, or solid color yarn... or place an order online. If you order online, it’ll be a week to ten days before you can start, but from the posts I’ve seen quite a few who have responded will be doing the same thing and there is no rush on the project, nor is there any penalty if you fall “behind” in any way. Some will knit more slowly than others and some will not be able to begin at the same time the pattern sections are released so don’t let that deter you in any way.
Whatever other choices you make about your yarn for this project remember it is best to use an animal fiber yarn for lace work as blocking opens up the stitches to show them off to their fullest. You can block other fibers, but not as easily.
I will be winding yarn from hanks onto my nostepinne for the next few days, as I’ve got time to spend winding yarn, so I won’t be starting immediately myself. When I’ve got some of my yarn wound, I’ll take a photo of the cakes and post them here for you.
In the meantime, welcome to our blog! There is still lots to do before we are all set up so please excuse the disarray... we are still adding stuff and organizing things. I’ll be importing some earlier posts I’ve done, in time, but for now you can read them at the Knit Picks Community where they currently reside... or wait patiently until I get copies of them over here.
We appreciate your patience and look forward to visiting with you again soon! If you should choose to participate in the Shetland Pi Shawl KAL, please keep us posted on your progress? If we can be any help or encouragement we’d be pleased to support you in anyway we are able! Even if it means directing you to another source of information. :-)
Joy in the journey!
Elianastar
P.S.: If you are interested in the EZ 100th Anniversary Shawl, you can download the pattern free from Ravelry. You have to be a member to access the download, but that’s free too! There are already three versions of this shawl available on Ravelry... all free downloads.
Subscribe to:
Posts (Atom)